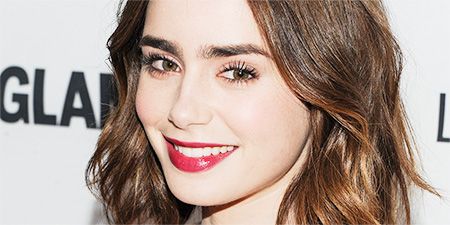
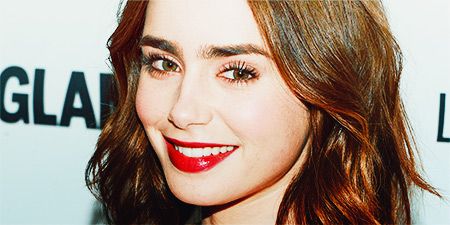
For this tutorial I will be using
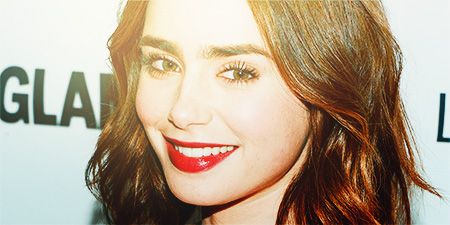
THIS picture of the amazingly beautiful Lily Collins, and modifying it to look like
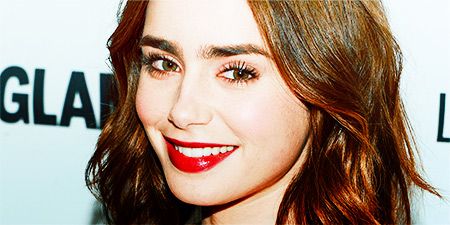
THIS.
Special notes:
- The original coloring/tone of your image has a huge impact on how good or terrible the coloring will look. In this case, the coloring works best with images that have neutral tones and not too many different colors.
- This tutorial was made using Adobe Photoshop CS6.
STEPS:
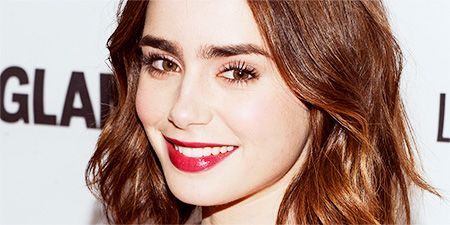
1. Unless Im working with an image that is already very light, I use this step 90% of the time, regardless of which coloring technique Im practicing at the moment.
Go to Layer -> New Adjustment Layer -> Curves
On the pop-up, press OK.
Input: 122 Output: 172
Now you have a nice and BRIGHT image.
___________________________________________
2. Shes looking a bit pale, so lets add some warm tones using Color Balance.
Go to Layer -> New Adjustment Layer -> Color Balance
On the pop-up, press OK.
On the Tone drop-down menu, select Shadows
Cyan-Red: +14
Magenta-Green: -6
Yellow-Blue: -7
On the Tone drop-down menu, select Midtones
Cyan-Red: +10
Magenta-Green: -5
Yellow-Blue: -5
On the Tone drop-down menu, select Highlights
Cyan-Red: -16
Magenta-Green: -10
Yellow-Blue: -8
Voila!
___________________________________________
3. Now its a little too warm and sunny. I want to create a contrast between warm and cold tones using Selective Color. (If a color is not listed, its value stays as 0)
Go to Layer -> New Adjustment Layer -> Selective Color
On the pop-up, press OK.
Colors: Reds
Cyan: -79
Yellow: +9
Black: +20
Colors: Yellows
Cyan: +7
Colors: Cyans
Cyan: +95
Colors: Blues
Cyan: +61
Colors: Whites
Cyan: +53
Black: -42
Colors: Neutrals
Cyan: +61
Magenta: +10
Yellow: +13
Colors: Blacks
Cyan: +41
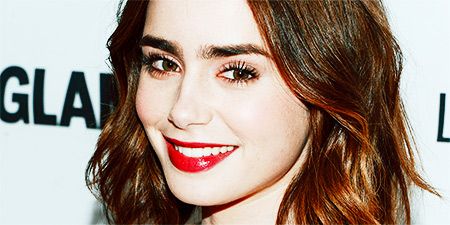
Oohlala. Contrasty. And look at that red!
___________________________________________
4. Lets make those reds pop even MORE using Saturation.
Go to Layer -> New Adjustment Layer -> Hue/Saturation
On the pop-up, press OK.
Select Reds from the drop-down menu
Saturation: +73
Select Greens from the drop-down menu
Saturation: +47
Select Cyans from the drop-down menu
Saturation: +53
Select Blues from the drop-down menu
Saturation: +52
Now shes like super orange, so lower the opacity of this layer to 30%

___________________________________________
5. This is another personal favorite I always use. There is no special reason behind it besides that it looks nice.

Go to Layer -> New Fill Layer -> Gradient
On the pop-up, select Soft Light from the Mode drop-down menu and press OK.
Now select a basic black and white gradient (Photoshop should have one by default) that fades from pure black to pure white.
Style: Linear
Angle: 90
Press OK.
This effect places more emphasis on wherever the white falls, and places a shadow where the darker side of the gradient falls. In this case, the lighter part falls on her eyes which is great because she has lovely eyes so lets emphasize them!
___________________________________________
6. Lets dull out the whites a teeeeeny tiny bit using an Exclusion layer.
Go to Layer -> New Fill Layer -> Solid Color
On the pop-up, select Exclusion from the Mode drop-down menu and set opacity to 40%
Use color #13171e
The difference might not be HUGE, but it helps soften the harsh whites a little.
___________________________________________
7. Now lets make it feel all dreamy and whimsical by giving it a warm glow.
Create a new layer and set it to Screen
Using the brush tool (with a 0% hardness) press on the upper left-side of the image using color #F5DA8F (about once or twice, you dont want the glow to become harsh). There is no right or wrong on the size of your brush, but in this case I used it at size 400px.
Now it looks like the sun is shining its rays upon our lovely Lily Collins. But its a bit strong, so lets lower the opacity to 60%.
Duplicate the layer with the glow and this time set it to Soft Light with 100% opacity.
Move this layer UNDER the Screen layer.
NOTE: The placement of the glow, its intensity, size, etc. are all entirely up to you and will most likely vary from image to image.
___________________________________________
8. Lastly, we will warm and soften the blacks just very slightly using a fill layer set to Lighten.
Go to Layer -> New Fill Layer -> Solid Color
On the pop-up, select Lighten from the Mode drop-down menu and set opacity to 70%
Use color #362f2d
WOO!!! Were ALMOST done!
Now simply merge all your layers
Layer -> Flatten Image
And most important step in graphic design history: sharpen.
Filter -> Sharpen -> Sharpen
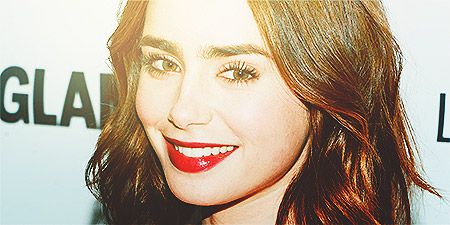
WOO!!! We did it!

And here is our final image:
I hope you guys enjoyed the tutorial and use it in the future!
")