 Potterdom Mod Potterdom Mod
Book Club Mod

DMAC & DoM
  Giant
Join Date: Jul 2003 Location: Ferrix: GMT-6
Posts: 56,907
Hogwarts RPG Name:
Moritz Schultz (#0f667e)
Ravenclaw Seventh Year
Hogwarts RPG Name:
Nancy Schultz (#ac6f77)
Hufflepuff Fourth Year
Ministry RPG Name:
Jabari Rahal (#c54031)
Mysteries
Ministry RPG Name:
Calloway Bennigan (#b8b323)
Accidents & Catastrophes  x11 x11  x1 x1
|  curly haired prefect - "sometimes I get angry!" - 30/90 - *chicken emoji* - probably @ Disney - I speak dog
 October's Graphic Maker Spotlight is momentai, although some of you older members might remember her as the awesome Tailzinator! Tailz has recently come back into the graphics biz, and due to her awesome style we've chosen to showcase her for the month of October. Congrats Tailz! SPOILER!!: Part 1: The Interview Interviewer: Lissy Longbottom
Interviewee - momentai
Hello ladies and gents of SS! Today we have the lovely momentai with us, although some of you older members might remember her as Tailz! Tailz has been selected for the AWESOME honor of being October's Graphic Maker of the month! So first off, you've been around SS for a while now, and I remember wayyy back in the day when you first started to make graphics (and by the way, we're SUPER excited to have you back graphic-ing again!) so what first got you interested in making graphics? How did you get started?
Haha, heey! Thank you for having me. It's an honour to be chosen! I got into graphic making just shortly after I joined SS, actually. My best friend at the time, and former member of the site, had her own shop and was making these little text icons and I thought it was just the coolest thing ever. I was inspired and I've been sucked in ever since.
Awesome! I feel like that's the case with a lot of people - they see their friends doing it and want to get in on the fun! haha. So what were some of the first things you ever did? Grab bags, requests, banners - how did you jump into it?
I believe I just jumped right into it with requests and grab bags. I was absolutely horrible and I had, like, the most lame photo editing software, but I did what I could at the time by seeing what others were doing.
Speaking of software, what did you start off with? And what do you currently use to make your graphics?
Oh man, I don't remember...that's how lame it was. It had come with my laptop. Currently, I have Adobe Photoshop CS6.
I vaguely remember using a pre-installed program to get my graphic career going as well haha. So, speaking from experience, I know that Photoshop can be CRAZY expensive. Any cheap alternatives you've used that some of our starting graphic makers might want to look into?
Well, if you're looking to pay nothing, GIMP is a free download. I only have a very limited knowledge of how to use it, but I've seen people do well with it. If you're okay with paying, Adobe Elements is a solid program and it's only around $100. I used Elements before moving on, so I can definitely recommend it. Also, a tip to anyone enrolled in a university/college, you can usually pick up the CS series at a reduced cost. My university (well, former) had 60-70% off deals.
Those are definitely important tips to keep in mind when buying a graphic program, I know I've used those same tips when getting stuff for my own graphics shop! So, you currently have a shop on SS - what really inspires you with your current stuff? Are there certain types of graphics you really like to make, a certain tool you feel is your "signature" tool, etc?
I think that, most of the time,I draw my inspiration from whatever resources I'm using or have just acquired. Whether it be a texture or a particular font, I'm motivated to create a graphic in a way where that resource will fit. Especially with fonts. However, I do get inspired by seeing what other people make and draw what I can from it, and that includes use of colours, blending styles, layouts, texture use.
I enjoy making all forms of graphics, whether that be avatars or signatures, but every once in a while I really do enjoy the challenge of a larger graphic, like a wallpaper or a poster. Very recently, I had to do this GIANT poster for a final university project. The dimensions were, like, 32" by 48" and I did it all in photoshop and it was an absolutely insane thing to do, but I had a ton of fun doing it. I just find that having a bigger canvas presents so many more possibilities with how to take a graphic.
As for a signature tool, I don't think I have one. I'm always learning new ways of doing something, so I never really get attached to one.
Oh wow!! So, if there's anything our readers should take out of this, it's that all that time on SS can actually be useful in school!!  If used in the right context, of course haha. So one final question before we leave - what's one piece of advice you'd give inspiring graphic makers who are kind of scared to get started, or have no idea where to really start? If used in the right context, of course haha. So one final question before we leave - what's one piece of advice you'd give inspiring graphic makers who are kind of scared to get started, or have no idea where to really start?
Hahaha! Stay in school, kids.
My advice would be, when you get that photo editing software, you play around with it and you go out and google for tutorials. That's how I did it. Practice does make perfect. Also, don't let yourself be intimidated by what you see other people making, instead let that inspire you to enhance your skills and become just as great as them. Finally, don't be discouraged or upset if people don't post in your shop. Just keeping practicing making all sorts of graphics and you will grab someone's attention. Practice. Practice. Practice. & have a little faith 
Great advice! Thanks so much, and I can't wait to see what you come up with for your tutorial! And don't leave us again!  Stay here. In MM's. For a long long time Stay here. In MM's. For a long long time  haha haha SPOILER!!: Part 2: The Tutorial Summary:
Tutorial: Animations
Difficulty: Easy to Medium, depends on your knowledge of Photoshop
Software: Photoshop CS6 (some earlier versions may work as well. CS5, for sure.)
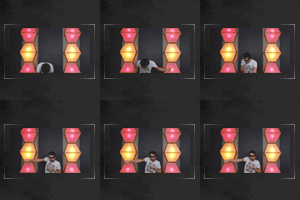
Hey, everybody! How are you all doing today? I hope it’s good! I'm going to be showing you how to make this today:
 KMPlayer Tutorial: KMPlayer Tutorial:1. I highly recommend that you download a program called The KMPlayer. Go ahead and install that. Go on. I can wait.
2. Installed? Great! Open the program up and you should get something that roughly looks like this. Don’t freak out, my KMPlayer will look different from yours, mine is an older build so that I can screencap DVDs. This tutorial is going to focus on capping from a digital file.
3. Open up the video file you wish to screencap. (I’m using MysteryGuitarMan). Right click on the window, go to Capture > Frame: Extract (CTRL+G), and you’ll get this handy little window
4. These are the settings that I use. I’m pretty comfortable with them, but I recommend tinkering around to find what is right for you. I find that the ratio of 1:4 (one capture for every four frames) can still give a pretty seamless animation.
5. Create a folder wherever you want to house your screencaps. Use the drop down menu, as seen here, to the left of the open button, navigate to your folder and set that as the destination for the output.
6. Once you’re ready, click start. In the “information” box, a timer will start, it will tell you the number of frames that you have gone through, and let you know how many frames you have captured. Hit play on your video to start capturing images. Take a look here to see what I mean.
TIP: You don’t have to capture the WHOLE video. If you just want a part of it, navigate to that part and click start there. Once you’ve got the scene you want, hit the Stop.
7. Now, if you go to the folder you specified as a destination, you should see that it has populated with a lot of frames. Animated Icon Tutorial:
Given the restrictions on the file size of avatars on SnitchSeeker, your animated icon needs to fall under 20 KB and that can be quite the task. If you create an animated icon that is 100x100 pixels and the animation takes up the entire canvas, you can maybe have two frames. This tutorial will allow you use more than two, but there is still a max number of frames you can have. It depends on how much you are willing to sacrifice on quality. 1. So, pick your caps and drop them into photoshop. I like to load them all into one document, so open up the first cap that you want (using file > open, or drag and drop into photoshop) and then you can simply add the rest by selecting them in windows explorer (use ctrl/shift/whatever the equivalent is on a Mac) and drag and drop them on top of the first cap. This should happen. Just keep hitting enter until all your layers are placed.
2. Right click the “Background” layer (the one at the bottom of your list) and select Layer from Background. You’re going to get a dialogue window, just click OK. The layer should now say “Layer 0”.
3. Notice how the rest of the layers have a funny little icon at the bottom right of the thumbnail? Right click any one of those and click Select Similar Layers (or you can ctrl + click them all). Right click on any one of them again and, this time, select Rasterize Layers. Icons should be gone now.
4. Time to resize our images. I generally use a width of between 75-80 pixels. It depends on how large the cap is. Also depends on the ratio. For example, setting a width of 80 on an image that is 640 by 480, will have a different height than an image that was originally 1920x1080. Play around, find what is right for you. Also, consider cropping the document first before resizing, especially if you don’t want your focus to become teeny tiny after resizing.
5. Go to Image > Canvas Size and change the size of your canvas to 100 x 100 pixels. (You may have to change the size type from cm to pixels using the little drop down menus. For some reason, cm’s is a default for me.)
6. Now, do whatever you want to the image and canvas. Don’t go too crazy, though! Remember, we need to keep it under 20 KB. Here is what I have.
7. Now, the animation part. Go to Window and click on Animation to turn it on. It should have a little check mark beside it and you’ll see a bar appear at the bottom. (If you notice, it’s been turned on the entire time for me).
Now, if you get this window, don’t worry. Just click the button at the bottom right (highlighted) and you’ll get the one we need for this tutorial.
8. Click the drop down menu on the animation toolbar (highlighted), and select Make Frames from Layers. It does exactly what it says: turns all your layers into individual frames. What Photoshop does is that it turns the visibility off for all but ONE layer. For example, the first frame is the first layer (first layer is at the bottom, fyi). It keeps the visibility on for that one, but turns off the visibility of the rest. The second frame turns the visibility of the first layer off, turns the second layer on, and keeps the rest of them off. Does that make sense?
9. Now, the first two frames for me are just the background layers. I don’t need those frames, so I’m going to delete them. Highlight them and click the little trashcan (highlighted). You’ll get a dialogue box, click Yes.
10. Also, you’ll notice the last two frames are empty. These two frames hold my adjustments layers. I can get rid of those frames as well. Now, we are left with the frames we want.
11. Hold up, what about the stuff we added? Do not worry, we’re going to turn those back on. HUGE TIP: if you are going to add anything or adjust anything, make sure you have the first frame selected! If you don’t, the changes will only affect the frame you have selected and the ones after. Having the first frame selected ensures that our changes will apply to ALL the frames. Also, you may have to toggle your first layer on and off a couple times before it’ll apply to all the frames. Photoshop is weird like that. So, here are my frames with the proper added layers turned on.
12. Open that drop down menu again and, this time, choose Select all Frames (or ctrl+click all the frames.)
13. You see that little time parameter on each of the frame boxes? Has a little upside down triangle beside it? Click that. You should see a list of times. 0.1 sec, 0.2 sec, etc. Choose a time. (I usually start with 0.2 seconds). Also, if you have to, there’s a little box to the bottom left that says “Once”. Click that triangle and select “Forever”. Now, your animation will run over and over and over..FOREVER. 
14. Hit the little play button to see your animation in action! If you think it’s too slow, play with the timing until you feel it is just right. For example, I thought mine was a little too slow, so I adjusted the time to 0.15 seconds. Feels a lot better.
15. Save the animation. File > Save for Web and Devices. Now I got super lucky, my animation falls under the 20KB limit on my first try (also, there’s no dither on it, so that kind of helps.) This will not be the case every time. Here is where you really need to play around.
Dither - No dither, diffusion, pattern, and noise. These help the colours blend together better in your gif. I recommend you have it on. It will raise your file size, but there’s one other thing you can play with to lower it again...
Colors - You’ll notice that mine is set at 256. You’ll also notice that my file size is 22.05KB which kind of sucks. If you lower the number of colors that are in your gif, the file size will decrease. For example, if I select 128 colors, my file size drops to 18.15 KB, which is good! Also, to me, there is no noticeable difference between that and when 256 colors is selected.
16. Once you’re satisfied with your settings and your gif, go ahead and save it. Congratulations! You’ve made an animated icon with MULTIPLE frames! You did awesome and I welcome you to share your results with me. I’d love to see what you’ve done.
A small disclaimer: I am not saying that my ways are absolute. I’m just sharing with you the way that I make animated icons. I HIGHLY encourage you going out and research and fine tune this process. Perhaps, one day, y’all will be teaching me the art of making an animated icon. 
Other animated icons: 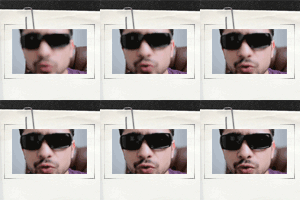 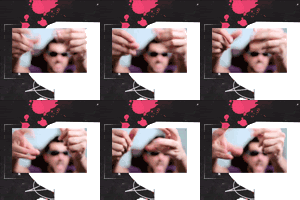 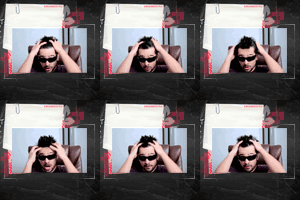 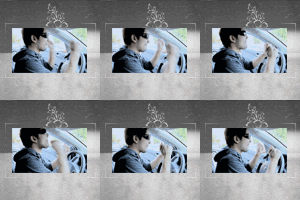
FREEBIE FOR YOU. Enjoy this texture. I use it a lot when I make animated icons. 
__________________ I'm still standin'________________________________________ better than I ever did

Lookin' like a true survivor_________________________________feelin' like a little kid
Last edited by Lissy Longbottom; 10-14-2013 at 07:26 PM.
|